
Technology is an ever-growing and ever-present part of our daily lives. From paying bills to playing games, technology is here to stay. With smartphones maintaining a major role in most of our lives, it is no wonder that mobile apps have become so huge.
Mobile apps have become so prominent that Apple’s App Store and Google Play Store have over 1.5 million apps – each. Apps that cover our scheduling needs, track our health, or shop at our favorite stores have all inched into our lives and made most mundane tasks simple, easy, and even enjoyable.
However, creating a successful mobile application is an involved process that requires time and dedication from you. In this guide, we’ll make the process of designing your dream application easier to understand. Let’s take a look at key objectives and challenges you will face while going through the app development lifecycle.
Stages of App Development
Your app needs to be spot-on to provide the best user experience for your target audience. The following steps are part of the Mobile App Development Lifecycle, meant to help
guide you through the stages of app building.
Stage 1: Pre-Planning
This phase is essential for refining your idea and creating a solid application. In this phase, you will need to hone in on your target demographic and analyze their goals, behavior patterns, and motivations. Understanding your buyer’s persona is a strategic move for breeding loyalty and ensuring that you have a strong customer base.
You will want to understand how they will be using your product early on since all steps of this process require that you keep the target users in mind. This will help ensure that you have a firm footing on end goals.
During this phase, you will be creating outlines and building rough blueprints for the rest of the project. Brainstorm potential issues you may run into and ways to avoid them. Analyze your competition, and maybe give their applications some serious consideration.
What do you like about their apps? What features do you wish were included? Learn about what does not work and correct these issues in your app as well as inventing new features.
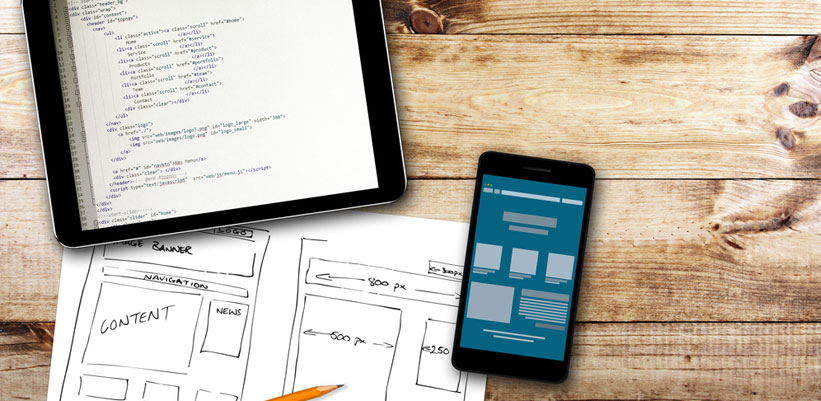
Stage 2: Wireframe and Communication
Creating a wireframe layout will help demonstrate the critical parts of interface elements and help you understand the future functionalities. Build on your blueprint and outline from the pre-planning stage and refine those components.
Design a detailed sketch of your project to assist you in envisioning the app that you want. This will be a wonderful way to communicate and collaborate with your team and stakeholders. Discuss any issues with relevant people and get outside perspectives on ideas.
A wireframe will help you arrange everything accurately to make the next steps a touch easier. Developmental and technical issues can be found and eliminated in this stage for the backend of the process. As you are building each feature, try to envision how these pieces will fit together for the end project. Remember, always keep your end-user in mind.
Stage 3: Assessment of Technical Feasibility
While analyzing your design and having an understanding of the visuals you will be using is vital, none of this will matter if the technology you need is unfeasible. You need to make sure that back end systems will support your app. To do this, you will need to access public data and source public APIs.
At this point, it is also vital that you determine the platform you wish to use to build your application. IOS and Android have different requirements and rules that you will need to follow. Your application will also vary depending on if you want to format it for use with smartphones or tablets. If necessary, you may need to review the status of your outline and make appropriate revisions.
Stage 4: Prototype
You need to handle your application to truly gain an understanding of how it will work. Creating a wireframe on a computer and even using the same app on a computer are not going to be the same experience you would have on a touch screen device.
Building a prototype with a rough wireframe will allow you to see how your application works at the simplest of levels. Share the prototype with stakeholders involved in the project. Gather their feedback and implement necessary suggestions to help refine your application.
Stage 5: Design
Development is the next stage, so focus a lot of energy in perfecting the design of your concept now. A user experience designer will map the design elements, while the user interface designer adjusts and creates that appearance of the app.
This stage is lengthy, and you will want to perfect it before coding begins. Review each design phase often and play around with various layouts and the means of navigation. Your engineers should understand what you are envisioning for your final product’s feel and flow.
Stage 6: Coding and Developing
Early stages of development have already begun in your prototype phase and you should have an understanding of the scope of work that will be involved. The functionality will need to be fine-tuned and a working prototype prepared.
This stage contains many steps, much like writing a story. You will have a very rough draft with many edits and functional improvements before your final draft can be crafted. In the beginning, your app will have bugs and many features will not be incorporated. Once testing and debugging occur, the deployment phase can begin.
The more complex the project, the more you may want to make use of the agile methodology. This will assist you with each small step of the way.
Stage 7: Testing
This is something that you should be familiar with by now. Testing happens in each stage, especially in the development stage. However, now, you will be delving deeper into application testing. The application will need to be tested for several things; including, its security, usability, performance, and compatibility.
This will require beta testing. Select users that are within your target demographic should be given the app for testing purposes. Ask them questions and have them fill out surveys to gauge what works and what needs to be improved. This will help you understand if the app is working well with real-life use.
Stage 8: Release
The time has come to submit your app. Follow the rules and guidelines that are required of you through your chosen app store, and then prepare for the formal launch. Feedback from users will be vital as you keep up with quality assurance.
Update the application frequently to help build customer loyalty and maintain a quality product. This application is an investment, and a long-term commitment to it and its customers are necessary.
Analyzing and Understanding the Life Cycle
Creating a mobile app takes time, and a lot of that effort goes into the planning and research stages. Understanding the lifecycle in depth will help ensure that you have prepared yourself for each step along the way, making the whole process more manageable.
Planning
Your initial analysis will allow you to investigate the idea and make corrections early on based on expert advice. Competition analysis will give you an idea of what other players are doing in the market, and when, where, and how you should launch your idea.
This along with the SWOT-analysis will give you an evaluation of the strengths and weaknesses of your product. Just as important is the ROI calculation – this assessment gives real value and lets you adjust your budget according to the future app market performance.
Market Research
Again, understanding your target audience is important throughout the whole project. Not only that, but you need to understand the overall situation of the market so you can adjust your product for the current demand.
Studying the market also means that you will need to have a firm grasp on what is trendy. This is critical for the beginning stages of development as this will impact every design element and feature that you are wanting to include.
While advertising or marketing early on, you will need to have a clear idea of the product that you are hoping to see once the project is complete. New and exciting features will help bring in a larger customer base and build interest for others who are into trending ideas.
You and your development team will need to be on the same page to meet the demand of your target audience and market. This is all part of the lifecycle that will help create the project that you are wanting to see released.
Preparing for Launch
Your team will need to prepare for launch starting as early as possible. Marketing and development teams will be able to guide choices for things like app names, summaries, and marketplace distribution.
Screenshots of completed sections can be placed on your brand’s website for promotional purposes. Promotional videos and eye-catching icons can also be placed on the website along with any social media pages.
The website should also include places where customers can purchase your app, links to your social media accounts, user reviews, and contact information.
Depending on the type of app, it may benefit from a mailing list that will allow you to send out emails for sharing updates and news and download links once the app is complete.
Conclusion
Creating a mobile application is a lengthy process that does not stop after the release of your product. Adhering to these eight steps will help guide you through the process: Pre-Planning, wireframe and communication, assessment of technical feasibility, prototype, design, coding and developing, testing, and release.
Stay organized and remain in constant communication with your team of stakeholders to keep each step organized and maintained. After you understand these steps for the mobile app development lifecycle, you and your team can develop functional apps on your budget and timeline.